Build your own commercial module part 4: manufacturing
2024-01-29 design panels byocm
I've written a lot about module design because from my point of view, that's the fun part. It's tempting to sit down with pen and paper, draw some schematics and sketches, maybe even build out some of those circuits on the breadboard, and then think you're close to having completed your very own commercial modules. If you have a workable design, then in one sense, you are close to being "finished." But in another important sense, it means you're just ready to start doing the real work: because with a finished design, then you still face the question of how to produce modules to that design in commercial quantities, and get people to pay you for those modules.
And guess what? You're almost certainly going to end up changing the design when you start trying to manufacture it - so you have to be prepared for those changes as well.
Manufacturing: getting it built
My original business plan for North Coast Synthesis included an estimate that if I could sell the number of modules I would like to sell, then I'd be able to do almost all the assembly work myself (subcontracting for a few items like PCB etching and panel printing, which are impractical to do in a one-person shop), and I'd be reasonably working full-time hours to make enough profit that I could live on the proceeds decently if not lavishly. I have occasionally gotten job applications from people who wanted to work for me as module assemblers, and I've had to politely turn them down, because that just isn't something I need or could fit into the way my business operates.
Your goals for your project may be different from mine, and depending what they are, the number of modules you're looking at producing (by which I mean the number of units of one design, not the number of different designs), may be different from mine in either direction. It would be a good idea to figure out how many units you intend to build, because it will make a big difference to your subsequent decisions on manufacturing. If you're building one unit, or three units, then it makes sense to build them all by hand yourself. If you're building a thousand, then first you'd better think carefully about whether the market is big enough for that (a topic I may discuss in a later article), and second, it'll make sense to do the manufacturing in a different way because of the greater volume.
Whatever your number of units, there are multiple steps in manufacturing a synthesizer module as a product. Here's one way to break down the process. Note at this point the list only goes as far as having the finished physical product in your hands; selling that product once you have it made, is a further set of tasks.
- Making the printed circuit boards (PCBs) - if any, but almost all modules will contain at least one PCB.
- Soldering electronic parts to the PCBs
- Making any customized non-electronic parts - for synthesizer modules, the front panel is the obvious one of these, but there might also be things like boxes, brackets, and other structural items.
- Final assembly - putting the PCB together with the other things to make a single object.
- Testing and adjustment - making sure the module works, getting things like V/oct tracking set properly, and loading firmware for modules that need such.
- Packaging - putting it in the box along with items like the power cable, mounting hardware, and promotional extras.
Each of these things has to be done. For each one, you'll have multiple choices about the technical details of how it is done, and those choices interact with your choice of whether to do it yourself personally, have your employees do it in-house (if your business is going to be big enough to have "employees"), or pay some other business to do it separately from yours.
Making PCBs
There's not much question when it comes to printed circuit boards: you will almost certainly want to contract out for that. Unless you are willing and able to build a big factory and actually make PCB manufacturing your main business, you can't compete on price or quality with the overseas contractors who do make PCB manufacturing their main business. For quantities between about five units and 1000 units, you can just visit a Web site, upload your PCB design, pay, and get your PCBs in the mail.
The contractors who do custom PCB manufacturing in small quantities tend to be located in China, though I've also done business with one in India. PCB manufacturers located in North America and Europe do exist, but they normally either deal in much larger quantities, or in special applications, and either way they don't have a simple point-and-click Web shop open to the general public. "Special applications" basically means customers who are themselves contractors for the military, and are not legally allowed to get their prototypes made by overseas PCB shops. Those people are willing and able to pay a large premium to have their boards made domestically.
If you're buying more than a few thousand dollars worth of a single PCB design, then it may make sense to at least talk to one of those domestic manufacturers, and at that level, your contract will be worth enough that you'll get personal service from their salespeople. But that is not the scale of most synthesizer module businesses.
I've encountered one PCB manufacturer who claims to be Canadian, and they charge only a small premium over Chinese prices, and then if you read the small print they explain that they operate by forwarding your order to a Chinese factory! When you get your boards, they may be shipped directly from China. The Canadian company is just providing English-language marketing and customer service for the overseas manufacturer, whom you could also deal with directly to get a better price.
Back in 2017 I wrote an article going into more detail on PCB shopping, focused on the different technical options that may be available. I don't have a current list of specific manufacturers to recommend, but it's not difficult to find them online, and the PCBShopper comparison site mentioned in that article is still around.
Soldering on the parts: PCBA
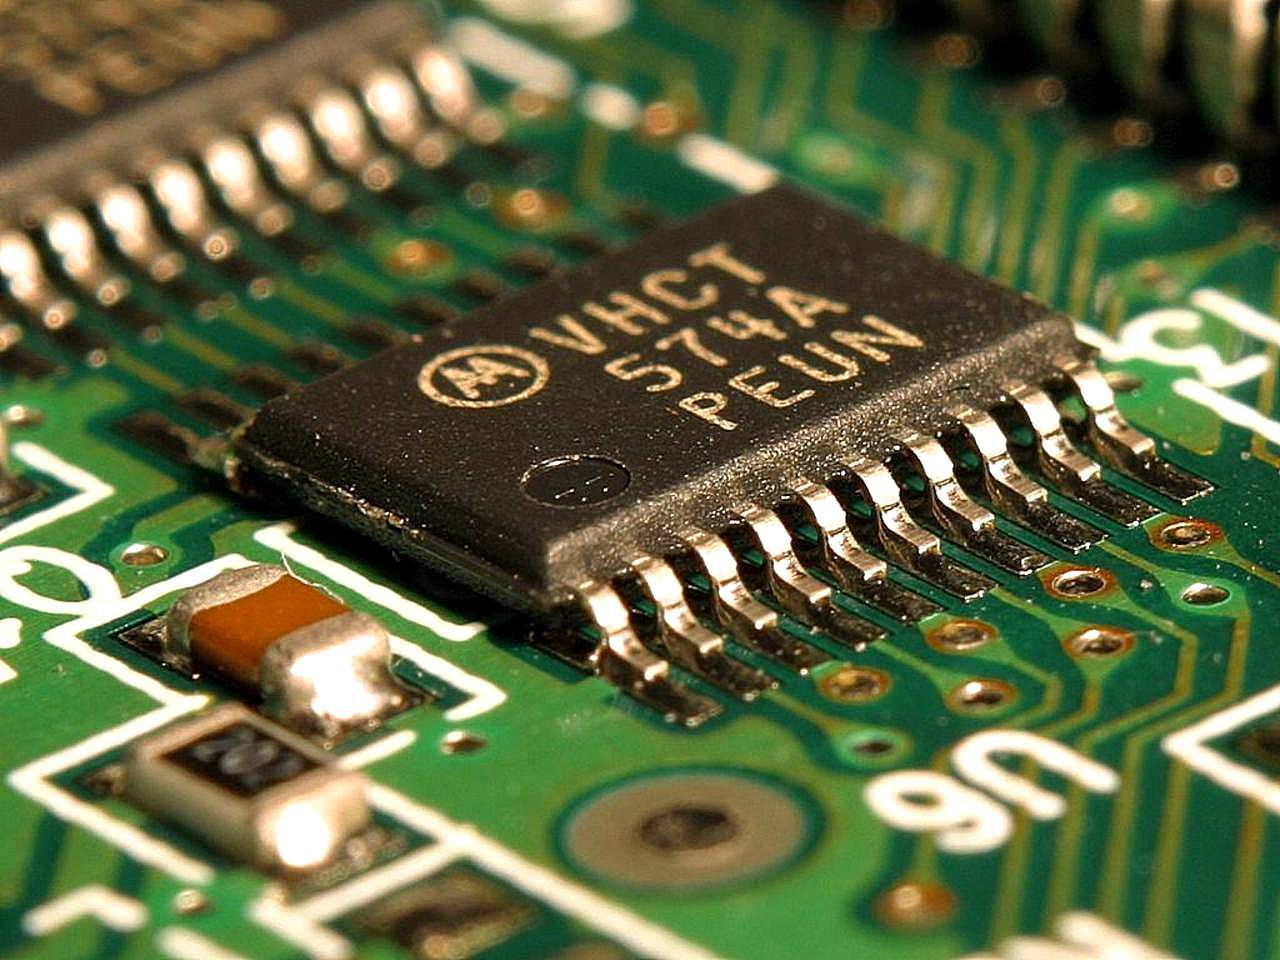
PCB manufacturing is highly automated: the production line is just one or a series of a few big robotic machines that take in blank boards, chemicals, and electronic data at one end, and spit out etched boards at the other end, with very little human intervention in between. Similar machines exist to do the next steps.
For large-quantity manufacturing, there will be machines that apply solder paste and glue in the right spots. Next a "pick and place" machine puts components onto the board, sticking to the glue with their leads or connection pads pressed into the solder paste. Then the whole board typically goes through a "reflow oven" which melts the solder paste, forming the electrical and more permanent mechanical connections. Nowadays this kind of process is almost exclusively applied to surface-mount components, but in earlier decades similar automation was also applied to through-hole (with machines to cut and bend leads, insert the components, "wave solder" the connections from the underside of the board, and so on) and automated through-hole assembly presumably still exists if you can find it and are willing to pay for it.
Many shops that offer PCB manufacture also offer what they call "PCBA," with A for Assembly. This service includes both manufacturing the PCB itself and attaching the components to it. And you can order PCBA in small quantities from the same kind of friendly point-and-click Web sites where you would order plain PCBs without attached components.
Contracting out for PCBA service makes a lot of sense, especially if yours is a surface-mount or mostly surface-mount design; especially if it features small-pitch components; and especially as your production run size gets larger. From a technical perspective, ordering PCBA is somewhat more complicated than ordering plain PCB manufacture. There is a lot that can go wrong. You need to convey information to the contractor about every component that will be attached to the board, what kind of component it is, where it goes on the board, which way it is turned (getting a diode backwards, for instance, will ruin your whole board), and so on. The file formats for communicating this information between your CAD system and the manufacturer's robots, are less thoroughly standardized than the consensus Gerber and Protel formats now universally used for PCBs themselves - although standardization on this point is improving.
There are also a lot of potential sourcing complexities when you buy a PCBA service. I'll discuss this more in the article on sourcing, but fundamentally, if your contractor will be attaching components to the PCBs, then they need to have those components to attach. Where will they get the components? Maybe they have a stock of components on hand which they will sell to you; maybe they will even give you components for "free," meaning the cost is included in other fees you're paying; maybe they will buy components in the bazaars of Shenzhen according to your instructions; maybe you can buy the components yourself, or hire yet another contractor to do it, and have them shipped to the PCBA contractor. All of these options are available depending on the specific contractor you use, and you'll have to both make a business decision about which option or combination of options you want, and possibly modify your design to switch to components for which the sourcing works out well.
There are often technical issues related to how PCBA service works, that will bear importantly on component usage. For instance, the pick-and-place robot has space for a limited number of reels of components. I mentioned this in a previous article but will recap it here. When someone removes one of the reels and puts in a different reel, that costs human labour as well as the lost time from stopping the machine, and therefore it costs money. So if your design contains many different components (more than the number of reels that fit in the robot), you'll end up paying extra fees for stopping the machine and inserting a different reel. Because the robot is not used only for your job, reel swaps may also be needed between your job and jobs for other customers. So very often, the PCBA contractor will do things to minimize reel swaps, and to give you an incentive to help them minimize reel swaps.
Maybe they'll have a short list of very commonly used components (100kΩ resistors, let's say) which they keep in the robot at all times, because almost all their customers want a few of those; and they'll give you a break on the fees for those parts. Then there will be a longer list of parts that they don't necessarily keep in the robot all the time, but they keep on the shelf nearby, ready for a quick change, because customers frequently request those parts - so if you use one of those, they give you some discount, but not as much of a discount as for the never-swap parts. Other, less commonly-used parts, that they might have to go buy just for your job or that you might ship to them, will incur full-price fees.
Another related, and somewhat arcane but also important, technical issue is that whenever they thread a reel of parts tape into the robot, it's kind of like loading a reel-to-reel audio tape machine. There needs to be an extra piece of tape that goes through the mechanism before and after the section of tape that actually gets played, or in this case that gets used for PCBA. The robot cannot start running at the absolute start of the tape, nor run to the very end.
If you bought and planned to use a full reel of taped parts, then there might be a "leader" and a "trailer" on the reel, which would thread through the machine like the leader and trailer on a reel-to-reel audio tape. But you probably didn't buy a full reel. And even if you did, the leader and trailer might not match up with the specific machine's requirements. If you bought a smaller chunk of tape on a partial reel, then maybe a human technician could sit down with a splicing rig and attach a leader and trailer, just like with audio tape - but that costs money. So whenever there's a reel swap, it's pretty much inevitable that one way or another, some parts on the tape are going to be wasted before and after the parts that actually get used. You're going to end up paying for those parts. It's no big deal if they are chip resistors worth a fraction of a cent, then you just have to make sure the tape is long enough; but it may cost real money if this is a tape of high-end microcontrollers or something, which cost dollars per unit. On the other hand, even though it's painful to pay for parts the robot cannot use, doing so can still be worthwhile because it may allow you to save more money elsewhere.
PCBA contractors will have very detailed specifications, which may or may not be written in clear English, laying out the relevant considerations for stuff like leader/trailer requirements. In small quantities, when you're ordering from a point-and-click storefront Web site, they may roll it all into some kind of simple all-inclusive fee (which as a matter of business necessity will have to be on the high side of what the service really costs). In larger quantities, when you've got more interaction with the contractor, the pricing rules will be more complicated but they will better reflect the realities of what it costs to fill your order, so you'll have the opportunity to save. It pays to read the specifications carefully, and plan out your component use in order to get the best overall deal.
If you want a through-hole part on your board (and you will probably want through-hole for some things like connectors and panel pots, even in an otherwise surface-mount design), then the PCBA contractor may not have a robot that can do it, so they will actually have a human install such parts by hand after the board comes out of the surface-mount robot. They charge a lot more for that, and in such a case, you might not want to pay it. Instead, you might opt to have the PCBA contractor install only the surface-mount parts that the robots can do, then have them ship you the boards, and you have your own people put in those last few parts at lower cost. You may also have a requirement (as is the case in some North Coast modules) that panel components should be soldered while the panel is attached, in order to get the alignment more accurate than would be possible with just putting the components on the board alone. It would be tricky, and would cost extra, to have a PCBA contractor implement that procedure. (But they will do it, or almost anything else you require, if your budget and order quantity are big enough.)
The front panel, and other customized parts
Most of the parts in your product, by count, will be things like resistors and ICs, which are standardized. The same resistor you buy is also bought by many other manufacturers for their own products, so distributors will be stocking it before you come along. The PCB is special because it is unique to your product; and the same goes for the front panel in a Eurorack module. In an electronic device other than a Eurorack module, there will often be some similar kind of structural component, like a metal box, that needs to be made specially for your product or at least customized for your product (such as by drilling holes and adding printing).
There are many options what sort of front panel you use and how it is manufactured. Doepfer spec for Eurorack says that the panel should be 2.0mm natural-coloured aluminum, but even Doepfer has made exceptions to that for special editions of modules with aluminum painted other colours, and other manufacturers have branched out into other materials including steel, several types of plastic, bamboo laminate, and so on. Depending on the material, the manufacturing process will be different. And, again depending on the material, there may be a plethora of options for how to print or decorate the panel.
I'm not a fan of "PCB panels" for Eurorack - that is, front panels made of fibreglass PCB material by the same contractors who make the PCBs as such. I think they look cheap and tacky, and there can be quality-control and durability problems associated with them. However, some people like the appearance of PCB panels, and using them when you are already buying PCBs as such from the same contractor, means one less supplier you need to line up.
If you're going for a metal panel, one option is to deal with a contractor who specializes in making these kinds of panels in small quantities. Front Panel Express is one such. These contractors are usually targeting the "prototype" market; a big company might make ten of something to test out the design before they go elsewhere to do their regular production run of thousands of units. The fact is that in the modular synthesizer business, our "regular production run" quantities are more like other people's prototype quantities.
The prototype shops usually use an NC mill (a robot very similar to a 3D printer, but with a cutting head instead of a liquid-plastic squirter) to cut your panel out of a sheet of material, cutting the holes as part of the same run. They can also cut engraved markings into the panel with the same machine, which can automatically switch between different-sized cutting heads for different parts of the job. Then either the sheet stock had a different-coloured surface to begin with, in which case the engraving will be visible by showing the layer underneath, or they can squeeze a gooey plastic paint into the grooves ("infill") to add one or more contrasting colours. Engraved markings look really good, but they are expensive because of the time they take on the cutting machine. A cheaper option is to do some kind of printing (usually silkscreen or UV-cured inkjet) after the unprinted panel comes out of the NC mill.
The big advantage of having panels made on a mill is that because the machine makes them one at a time, and just runs more or less directly from a computer file, it is cost-effective to make the panels in small quantities. You don't pay a large per-job setup fee. However, because you are running an expensive general-purpose machine to make just one panel at a time, it is cost-effective only in small quantities.
An important rule to remember about manufacturing is that a general-purpose machine, capable of doing many different tasks, costs more to run than a special-purpose machine, which just does one thing well. But on the other hand, because the special-purpose machine can be run on a smaller range of jobs, the shop needs to have a big enough volume of those particular jobs to justify having the special-purpose machine at all. So, small shops end up with general-purpose machines, and can use them for small jobs, whereas big shops will have the special-purpose machines and will demand a larger minimum order size. Human beings fit into this picture as the ultimate general-purpose machines: almost any task can be done by hand by a human instead of using a machine, but having a human do it will cost more per unit and is only practical in the smallest quantities.
So if you want to make hundreds of identical panels, then instead of having them milled it is cheaper to use other machines that are specialized to the different steps in the process, and can do the steps much faster: a shear to cut the panel to size, a drill to make the holes, and so on. If your quantities are big enough to justify that, then you will end up talking to bigger machine shops that do not specialize in electronic front panels in particular.
Some PCB shops offer "aluminum-substrate PCBs," which are basically very thin plastic PCBs glued onto aluminum sheets. The original application was in LED lighting, where you've got surface-mount components that generate a lot of heat, and having a solid chunk of aluminum built into the circuit board helps conduct the heat away. Ordering these is much like ordering a regular PCB. You upload your files and tick a box on the order form for "aluminum substrate." It costs more than fibreglass, but not unreasonably so. Some people have experimented with using aluminum PCBs as "PCB panels." They have some of the same limitations as fibreglass, but they have the big advantage of being sturdy aluminum, and you can use the PCB copper and silkscreen layers for your graphics, making a separate printing or marking step probably unnecessary.
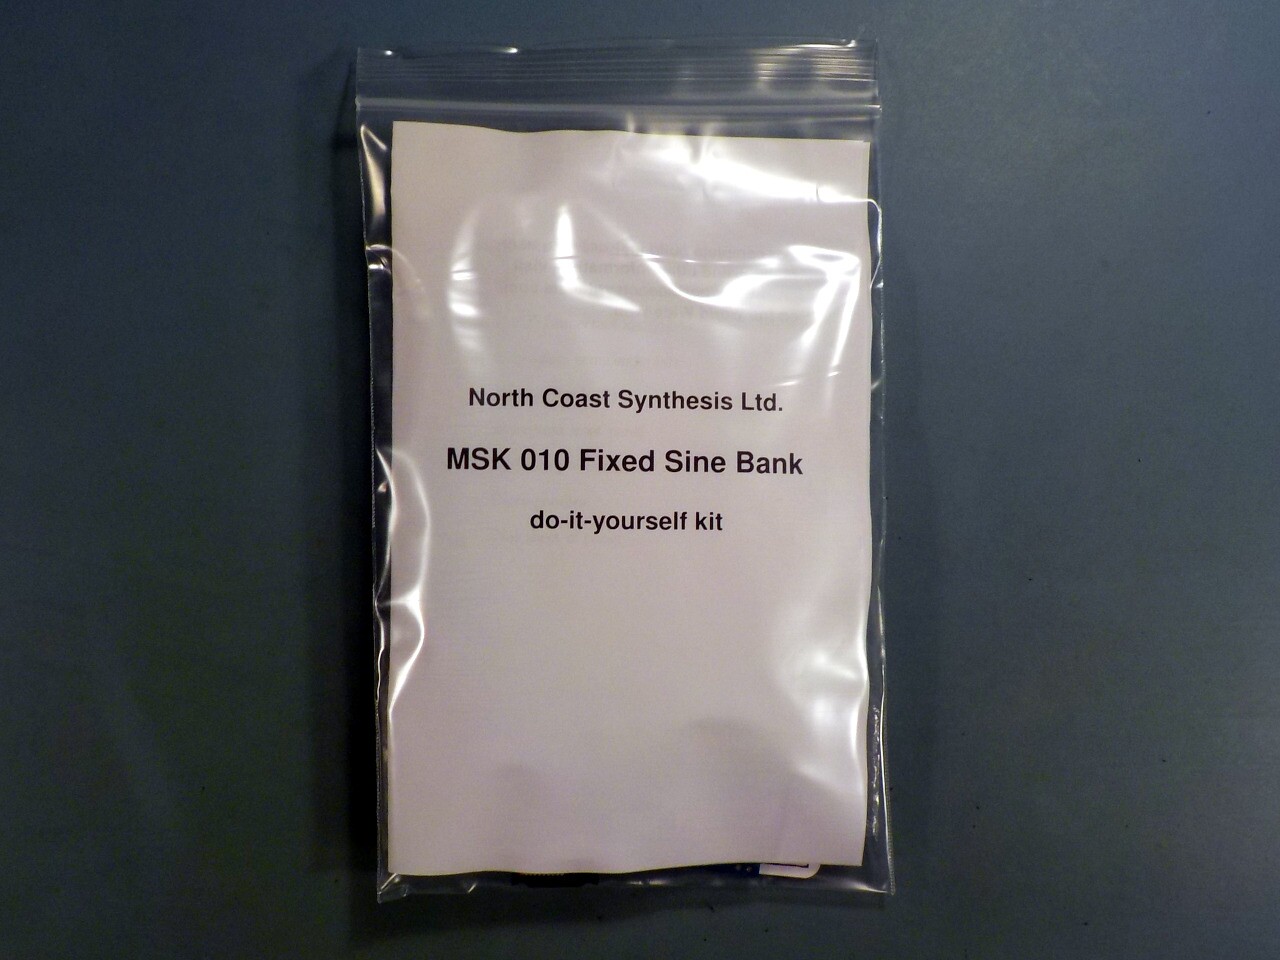
When I was gearing up to release my first commercial module, the MSK 010 Fixed Sine Bank, I spent a lot of time and money shopping around to different panel suppliers. I approached several Chinese machine shops that I contacted through AliBaba, and I had to learn a fair bit both about business in general and Chinese business culture in particular. For instance, the concept of a "binding price quote" means something very different to me as an English speaker, from what it apparently means after being translated into Mandarin. I could probably write another whole series of articles about this phase of developing my business.
Here's a photo of three sample panels I was comparing in 2017.
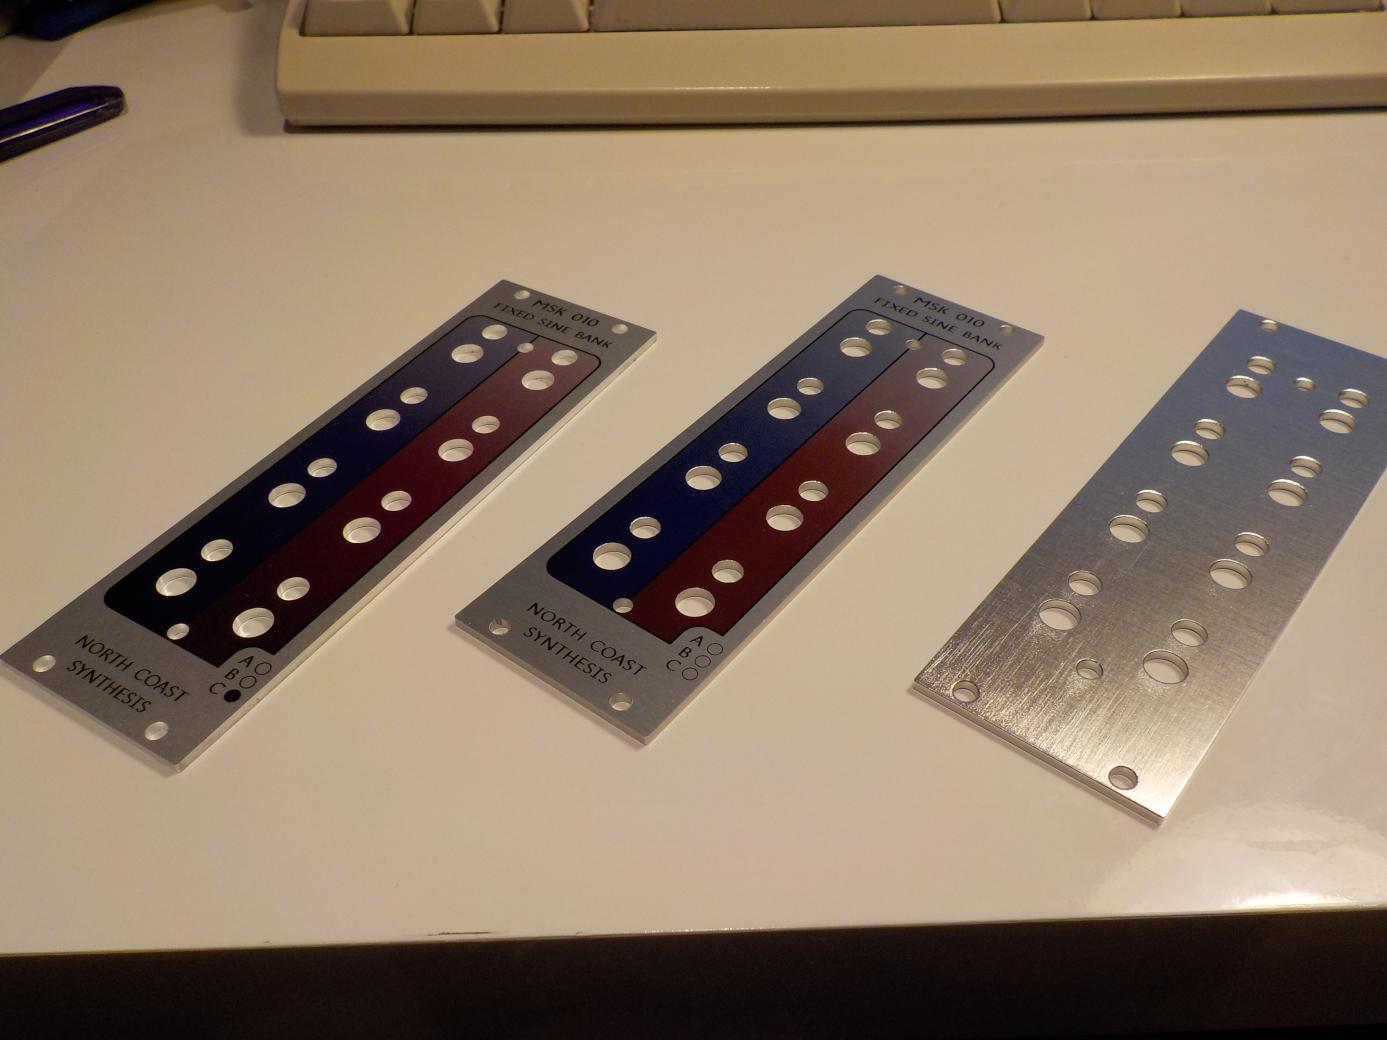
The one on the left is from a US prototyping shop and cost $54 (Canadian), in quantity of four units. This one would not cost much less in larger quantity, because that's how the prototyping shops work. It's made on an NC mill with UV-cured inkjet printing.
The one in the middle came in a sample order from a Chinese manufacturer; that particular panel cost me $129 per unit (!) for three units, but that's because they charged the same setup fee on it that they would on a larger order. In effect there's a drastic discount for larger quantities. This one is also NC milled, but with what appears to be silkscreen printing on it. I think they achieved the colour gradient by using three different inks and halftoning to fade between them; the difference from the UV-inkjet print is more visible in person than in the photo. It can't have been easy, and I think that ended up being a significant part of the price.
The one on the right is a sample from another Chinese manufacturer. My best guess is that they initially cut it on an NC mill but then they made more than one failed attempt at printing on it, removing the failed print with a wire brush attachment on a bench grinder after each attempt. That seems like the most plausible explanation for the texture visible in the photo. Something that's a little less visible in the photo is that some of the holes are not the right sizes. Net of an extra payment the shop demanded after I thought we had a deal, a partial refund when after months of "yes, we can do it!" they finally admitted that they could not actually do printing at all, a frank exchange of views in email, and so on, that panel ended up costing me $46 per unit for three units. By the end of the process I was just in it for the educational experience and the story to tell, because it was clear I wouldn't be dealing with them again. They never did quote me a price for a production run, and even if they had, I wouldn't have trusted them to adhere to any quoted price.
Those weren't the only three places I looked at, but I did deal with the manufacturer of the one in the middle of the photo for my first production run of Fixed Sine Bank panels. In later runs I switched to a European shop which does milling and UV printing for what ended up being less money.
Don't forget about other "structural" or non-electronic parts that you'll need, such as knobs and even mounting hardware like screws. Knobs cost a lot more than you or your customers might expect, and more still if they are made out of anything other than plastic. Although many styles of knobs are available off-the-shelf, getting the look you want is important, as well as compatibility with the pots and other devices on which you'll be mounting the knobs. To get knobs that really work for you, it's quite possible you will end up ordering them custom-manufactured. Then you will need to meet a minimum order quantity, and you can have the same adventures with knobs that you might have with panels, trying to find a contractor who can produce what you want in your desired quantities and at acceptable quality levels. I had one batch of knobs in which over 10% turned out to be defective (with stripped setscrews that prevented them from being attached to the shafts); that was bad enough for the knobs I was using in my own manufacturing, but even worse because I had shipped some of them in kits to DIY builders. In principle it might seem easy to replace just the bad setscrews, but I discovered that buying a setscrew alone costs more than buying a knob with a setscrew included. As well as needing to get replacement knobs to anyone who might have received bad ones from me, that adventure pretty much entailed my switching to a new contractor for the next batch.
I'm not sure what I can give as bottom-line "what to do" advice on having panels and similar items made. None of the options is really great. You can trade off quality for convenience, or convenience for price, and you may be able to do better by shopping around to different contractors, but some of them will also waste your time with nonsense. The panel is going to be an important part of your design and your branding; so about the only that I can say that I'm really sure of is that you should figure out as clearly as possible what your goals for it actually are, and then focus on those, being willing to compromise on whatever is not so important.
Final assembly and packaging
When all the shipments from the various contractors and suppliers come in, you may end up with:
- One or more circuit boards, possibly with most of the components soldered into them, but quite likely not all the components soldered yet.
- Some through-hole components that are not yet soldered in.
- A panel.
- Knobs and structural hardware.
- A power cable (not yet mentioned here, but this is another item you'll have to either make or buy).
- Other items that go with the module, such as mounting hardware and promotional goodies.
The module has to be assembled: any components soldered in that need to be soldered and haven't yet been; boards and panel fastened together with whatever means are being used for that; things like nuts threaded onto bushings to hold pots in place; and knobs attached. Then the module and everything that goes with it need to be put in some kind of package.
You, or your employees if any, may be able to do all these final assembly steps in-house; but you do need to budget the time for it. Even apart from testing and adjustment (discussed below), final assembly is likely to be at least a few minutes of work per module. That much work might be negligible for just one module, but a run of 50 modules can easily take a day's work or more.
It is worth making sure you have the right tools for final assembly. I've bought a specific wrench or driver for each size of screw and nut used in my products, so that I'm not messing around trying to use general-purpose tools like adjustable wrenches to tighten panel nuts. Hand tools follow the same rule I mentioned for machine tools, on a smaller scale: general-purpose tools are cost-effective when you're doing many different things a few times each, but if you are doing the same specific task (like driving a certain size of screw) many times, then it's more efficient and cheaper to get a tool especially for that task.
In Eurorack you'll quite likely end up making your own power cables. You can try to fudge it with a benchtop vise that you probably already have; or buy the $40 crimp tool; or the $800 crimp tool; or the $20,000 automatic crimping robot (which will probably require three-phase power and so on). Trying to fudge it with a benchtop vise is what most hobbyists do, but may not be a good idea if you're selling the results, because it doesn't take many wrecked connectors, and even fewer defective cables that cause damage, to pay for the $40 crimp tool. I use the $40 crimp tool followed by a stripboard device I built to verify that the cable isn't shorting out, and then I also try to do the testing and adjustment for each module using the same power cable that I will ship with that individual module, as a further check.
The time for packaging tasks can also add up. You may need to do things like preparing "goodie bags" of mounting hardware and maybe stickers or something, to tuck into the module packages. And then you have to actually have those packages.
How you package your product is both a matter of branding and of practicality. For most Eurorack modules, the main package will probably end up being a cardboard box of some sort; but there's an endless variety of them available, and you should figure out your budget, absolutely figure out your quantity, and spend some time shopping for the most appropriate package. In larger quantities it becomes cost-effective to get boxes custom-made, or at least custom printing on a standardized box. In smaller quantities, it may make sense to get an unprinted box and personalize it. I have a rubber stamp I use to add some North Coast Synthesis branding to the otherwise plain cardboard boxes in which I package my modules. Options other than cardboard boxes also exist. If you package your modules in some creative way it can help build brand recognition and create a feeling of quality; but if you're not careful, it can also drive up the price of your product and give customers a negative view that you're gouging them for unnecessary extras.

Customer perception of the environmental footprint of your packaging may also be important, and unfortunately, that's often more a matter of perception than reality. I occasionally hear from people who think it makes sense to ask for "plastic free" packaging of a synthesizer module that is, itself, largely made of plastic, let alone precious metals and other materials that far outweigh the impact of a couple of plastic bags or some shrink wrap. It's not even true that plastic is the Devil in such matters. The cotton bags I've seen a few manufacturers use for things like mounting hardware have a much bigger footprint, and are no more reusable, than standard polyethylene bags would be. Similarly, if one module is ever destroyed by static electricity, then the environmental footprint of replacing or repairing it will far outweigh a hundred modules' worth of antistatic plastic bubble wrap that could have prevented such an occurrence.
Nonetheless, if you think it will please your customers, it may make sense to focus on their perceptions. I don't go as far as using cotton, but do make a point of using unbleached cardboard both for environmental reasons and because (even though white would cost about the same) that way it doesn't look like I'm spending extra money unnecessarily on packaging. I also use 100% post-consumer recycled printer paper for all my invoices and other paperwork. The bottom line here is that your product isn't just a schematic diagram. It's the whole module implementing that schematic, but also the entire package containing that module and its associated bits and pieces, and even beyond that, you are selling the entire story of the customer buying and using it and how it fits into the world.
Packaging for shipping is also worth thinking about, but probably a separate question. Usually, you'll be putting the box that is basically part of the product into a second cardboard box that gets shipped somewhere. Depending on your business model, that might be directly to the customer, or to a distributor or dealer, and the difference between those two is that an individual customer is probably buying just one or two modules at a time, in a small box, while you hope a dealer will be buying more per order - in a bigger box! When you're going to fill orders and ship modules, you need to have appropriate boxes for them on hand, and you can't necessarily depend on random boxes you might be getting from your own suppliers with the items that you're ordering yourself.
Testing and adjustment
Somewhere in the middle of the section above, in between final assembly and packaging, there's another important step that is easy to overlook: testing and adjustment. You need to know that the module really works, especially if important parts of it were not made by you, because it is you who will have to deal with the complaints if it doesn't work when it gets to the customer. Also, even if the module was perfectly assembled and does basically "work," whatever that means, it may need some attention before it can work its best. For instance, anything analog with a V/oct input or output is probably going to have a trimmer somewhere that needs to be adjusted to make that input or output track accurately.
Unless you are shelling out big bucks for high-precision versions of fixed-value components like resistors and capacitors, it is likely that substantially the same components will have different values from one otherwise-identical board to the next. Usually, you compensate for that and get all boards operating the same by making some components variable and adjusting them after the module is assembled, to get the overall circuit where it needs to be. I wrote a whole article earlier on designing for adjustment, which goes into some of these issues.
I usually prefer to say "adjustment" for synthesizer modules rather than "calibration" because "calibration" is often reserved for adjusting, or even just characterizing, the accuracy of measuring instruments in particular. If you have a high-precision voltmeter you might occasionally send it back to the metrology lab to be "calibrated" so you will know that the things you measure with it really are what the meter says they are; but what you do to a Middle Path to minimize the glitch in the sawtooth outputs is you "adjust" it.
Adjustment and test procedures for my own designs are in the use/build manuals, mostly for the benefit of DIY builders, but even if you're not going to be publishing them you will probably need to have written procedures. As with so many other things in this business, you can do it yourself or have employees do it in-house. Since the module normally needs to be fully assembled before you can test and adjust it, it may be difficult to outsource this work; but if you can develop an adjustment and test procedure that works on the board before it's assembled, you may be able to get your PCBA house to do some of this work for you. They will certainly be doing some testing of their own, at least for basic electrical integrity of the PCB, before they ship it to you.
Testing and adjustment will probably require test and measuring equipment like voltmeters, power supplies, and oscilloscopes. Depending on your volume, it may also make sense for you to design and build some specialized tools just for your project; like, say, a jig that probes the specific test points where the voltages appear that you need to monitor while adjusting a given trimmer. I've also done things like writing software for a programmable module in my rack, to automate V/oct tracking calibration.
Mentioning software brings up another point related to test and adjustment, which is that digital modules with microcontrollers, FPGAs, or other programmable components in them, may need to be loaded with their firmware. This may be a service you can purchase from the microcontroller manufacturer or the PCBA shop; or you may need to load the firmware in-house after you receive the boards. Quite often you'll need to build features into the board for attaching the specialized tool that does the firmware loading, and then one of the steps in your test and adjustment procedure will be to connect the tool and load the firmware.
In the case of the MSK 014 Gracious Host, my expectation is that the chip will be pre-programmed before it's soldered in, with firmware that is at least good enough to talk to the USB port and load revised firmware. Part of my test and adjustment procedure before shipping an MSK 014 is to plug in a USB stick with the latest firmware and make sure it loads, both so that I can see it is capable of loading new firmware, and to be sure it has the latest firmware (with any updates that may have occurred since I built the module). But I also have pads on the board connected to the programming pins of the chip, so if the chip on the board is without firmware that can talk to the USB port for whatever reason, then in the worst case I (or someone else) can solder in a header there, plug in the Microchip debugging tool, and load new firmware that way.
There is much more that can be said about manufacturing, and I've focused more on the technical aspects than on the practical business issues of how to get in touch with contractors and arrange for them to do work for you. Some of those issues are the sort of thing I discuss more personally with my consulting clients, according to the needs of their projects in particular. Some of them I'll talk about in future articles here. But I've at least summarized the major tasks in getting a module physically built: the circuit board; the components going onto the circuit board; the front panel; final assembly and packaging; and testing and adjustment. These are the main things you'll need to think about at the manufacturing stage.
◀ PREV Build your own commercial module part 3: firmware and documentation || Why you need complex numbers NEXT ▶